Showing posts with label Portfolio. Show all posts

4 July 2014

Creative White Shirt

Hi all,

As one of the first projects on my course, we had to take the basic pattern cutting skills that we developed, and exploit them in a creative white shirt.
I chose to base mine on containment, and the ideas of Victorian life. I created a shirt that buttons up the back with a row of pearl buttons, it has a wide high neck and exaggerated sleeves. There are external panels that wrap over the sleeves, limiting the arm movements of the wearer.
The lower part of the shirt I developed a pleated feature, which I lined in a satin lining to emphasize. 

I definitely wasn't thinking 'wearable' when I designed this, but I wanted to explore elements that could then be extracted and adapted into something slightly less dramatic.


It's a little crazy, and I probably won't be wandering down the high street wearing it any time soon, but I had so much fun making it, and I am really pleased with the outcome.

xox Niamh xox

1 July 2014

Cobweb Textiles

Hi all,

Let me introduce you to a mini project I did, involving the colour pewter. I chose to explore cobwebs, as they become visible when they are covered in frost in the early winter mornings. 
I translated these images onto fabric, first dying the fabrics then working onto with angelina fibres and free machine embroidery. The angelina fibres helped to give a reflective nature to the pieces, and look different colours as they move. 


xox Niamh xox

8 November 2013

Milly Skirt

Hi all,

The past three weeks have flown by in a blur. I completed the first half of my first module at University, in flat pattern cutting. Our main project was to re-create a skirt from Milly by Michelle Smith A/W 2012-13. We didn't have any instructions on how to do it, just the basic pattern manipulation skills that we learnt.  We had to try to create an accurate representation of the run way image, in calico and black contrast fabric.
I won't bore you with details of how I did it, but it involved a good few pattern drafts, half toiles, full toiles and lots of yoke samples. I am quite pleased with how the skirt turned out, but I am most pleased with the progress I have made with my pattern cutting.


This is the runway image of the skirt.

Here is my interpretation of the skirt, including side seam pockets (which were really satisfying to have made!)

Hope you are all well,

xox Niamh xox

29 September 2013

Mans Shirt Project

Hi all,

Sorry its been a little while. I have made the move to uni, but unfortunately we have had a fair amount of things to deal with. One of which is no internet, which should be set up on the 1st October!!! But I will continue...
As an introductory project/summer project to my uni course we had to take a mans shirt and adapt it to create a new garment that would be suitable for Spring Summer 2014. This basically meant that you could do whatever you wanted to it (as the S/S14 shows had not yet happened) I started with the GORGEOUS linen shirt that I picked up from a charity shop near my home. It was so huge I thought that it would give me ample fabric to play around with.


After a while of looking for inspiration and a few fabric tests, I decided that I wanted to create ruffles on the top that slightly changed the silhouette and were a different colour (which would make them stand out) I tie dyed them and dip dyed using dylon olive green, which kept the natural feel of the colour that the linen was. I circle cut the fabric to create the frills, and as that required a large amount of fabric the top quickly shrunk to a crop top!


The cream bias binding gives the edge a bit of a pop. I used the old front of the top to create the back of the new top, retaining the button fastenings and also the pockets. (Because everyone needs pockets by their shoulder blades!)


Thats what I made from the mans shirt.
Shopping charity shops can be really fun and changing things you buy makes them so much more unique and exciting. 

xox Niamh xox 

25 July 2013

Flower Oil Painting

Hi all,

I love painting, and unfortunately haven't had time to do much of it over the past year. So jumping in the deep end I decided to paint an oil canvas for my Grandmothers birthday. I have previously painted her flowers, and she had been asking me for a little over a year if I could do another one for her. This one is a complete surprise, and although her birthday was a week ago I am giving it to her this weekend, as I wanted to make sure that the oils had completely dried (I didn't want them marking her cream walls with green!)

I worked from a photo I took of an open tulip at the Eden Project, but made a slight adjustment to the colour, I kind of amped up the red in the petals, and made the background a little bluer. Oil paints are such a lovely medium to work with, they are so smooth and just blend like a dream, the down side of their slow drying time is that you have to be carful where you rest your arms (I ended up like the incredible hulk after one painting session!)

Here it is:


What do you think?

xox Niamh xox

30 June 2013

Final Show Fashion Illustrations

Hi all,

As promised, here are the close up images of the fashion illustrations that I produced to go along with the fashion piece I produced. These illustrations were the way I chose to communicate the collection I designed. I used gold ink to tie the actual design material in with the illustration. The collection is of six garments that are all of a similar aesthetic, which emphasize and restrain different areas of the body.


xox Niamh xox


27 June 2013

End of Year Show

Hi all,

My Art Foundation year has come to a close, and it went out with a bang. Our end of year show was a great success, and I think everyones work looked great. I had on display the gold bustle cage and illustrations of the "collection" that it would be a part of.
The garment is made from PVC plastic, which I spray painted gold, then riveted together. The ribbon lacing the back and front was a combination of a green satin ribbon, and an off white cotton lace. (I lovingly stitched the two together for 3 hours!)
I am quite pleased with how it turned out. Based on Victorian fashion and history, it is restrained and cage-like, which reflects how women were treated in that time. The high neckline, is quite claustrophobic to wear. Oh and the green ribbon is a similar colour to the killer wallpaper that was fashionable at the time, which was laced with arsnic. (Happy things really!)

Enjoy


Me with the piece. Dress and lace top from Free People (see previous post)
Hope you enjoyed seeing it.
Future post with close up photos of the illustrations is in the works :)

xox Niamh xox


13 May 2013

Victoriana Project

Hi all,

My Art foundation is nearing its end very very quickly! It has just flown by and I have just two weeks left on my final project. I though I would share a sneak peak at what I am making. Here is a fashion illustration that I made to communicate my final design. It to be made of antique gold plastic, with a sepia feel, representing cage crinolines and corsetry seen in the Victorian era, but with a modern approach. The structure I am making is like a cage, and my intention is that a variety of garments could be worn underneath.


More coming soon :)

xox Niamh xox

23 April 2013

David Downton Master Class

Hi all,

Bath in Fashion has become a highlight of my year! There are so many great events that they put on, and this year was no different. I attended two events on saturday with my good friend Sophie from Imitation is the greatest form of flattery: Check her blog here...

Original illustration by David Downton of Linda Evangelista wearing Christian Lacroix
for V Magazine USA, July 2004. Gouache and ink on paper. 

The first one is the David Downton Master Class. David Downton is a well known, and amazing fashion illustrator/artist (he is currently artist in residence at Claridges in London), so to be able to do this master class was so exciting. It was held at the Bath Spa Hotel, in the Grange Suite, which was a really beautiful room with amazing wall and ceiling details. Anyways, room aside. The group doing the session was about 30ish people. One of which was Milly Mackintosh from made in Chelsea.
The atmosphere was great, the model, Jade Parfitt asked David questions, whilst we drew her. Throughout the session I gained an insight into how he works, and I feel I learnt lots of great tips. The drawings that I made in the session were not amazing, but the experience and what I have taken away from it really made it worth it.

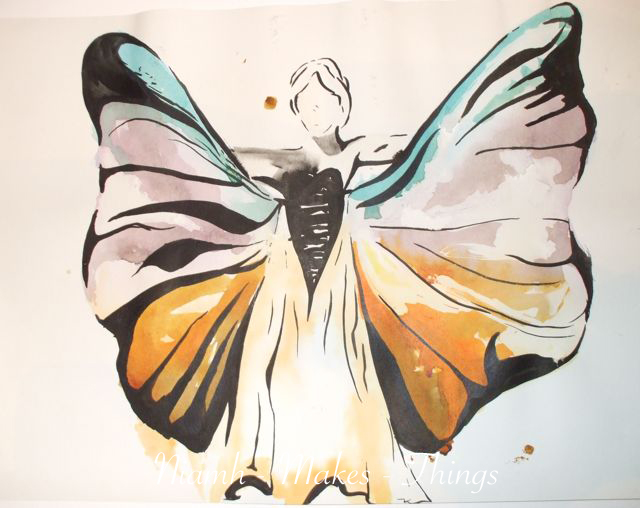
These are some drawings I did at home, using what I had learnt in the session:


So I shall share some of his tips:

1. He makes an initial drawing, where the aim is to get as much information as needed down, and to get the most accurate drawing possible. Then he takes that drawing, a new piece of paper and a light box, and he EDITS. This means that he pulls out certain lines to create the drawing style he is known for.

2. Tip: If you are drawing and you are getting stuck, change material. If you are working in pencil, try using fine liner, sharpie, colour.... (he quite likes working with a brush pen as it gives a nice fluid line)

3. Where it goes wrong, don't be afraid to use tip-ex!! He doesn't work on the computer much, so his way of making corrections is to use the dreaded white liquid. If you need to, go for it.

4. When making a fashion drawing he starts with the head. As you work towards the bottom of the page (remember to fill the page) and you are still drawing legs, don't force yourself to draw in feet. If they don't fit onto the page, then they don't fit. Nothing looks odder than feet where the calves should be.

5. He tends to emphasise one eye more than the other. He explained that this stops the eyes from becoming too overpowering. If you draw two eyes with dramatic makeup the model can look like they have panda eyes. Not a good look (....except on a panda)

And finally my tip:
When starting out attempting his minimalist approach to fashion illustration grab a fashion magazine and some tracing paper. Use an image of a model and try pulling out lines from it. You will see how little you need to draw in order to capture the figure.

xox Niamh xox

20 March 2013

Armour Dress

Hi all,

Here is the small scale dress that I have been working on for my armour project.
I printed onto the velvet with silver ink using a silk screen. The metal is aluminium, which I edged with the velvet I used for the main part of the dress. Hope you like it :)


Working on such a small scale was quite tricky. The fabric (as pretty as it is) had the tendency to slip when sewn on the machine, so most of the sewing was done by hand.
I might make some more things on this scale, I quite like how quickly different ideas can be produced.

xox Niamh xox

5 March 2013

Fashion Armour Illustration

Hi all,

My current project at college is based on armour, which is quite exciting. I have really enjoyed looking into armour and its links to fashion and architecture (particularly gothic armour)
I am working on a small scale, making things for my mini mannequin and I have been using aluminium sheet metal, which has been... interesting.

I am really enjoying fashion illustration now, and am looking to improve my skills. The best way to do so is to...practice. So here is an illustration I have done of a design during this protective project :)


xox Niamh xox

3 March 2013

Butterfly Fashion Illustration

Hi all,

Follow up post to the one where I showed the butterfly bolero/cape thing I made for a college project. This one is two fashion illustrations of the bolero/cape thing :)


xox Niamh xox


12 February 2013

Butterfly Fashion

Hi all,

So, for a project at college I designed and made a butterfly cape which I sharing with you now :) It was only a three week project so I didn't have a huge amount of time to make it (only 1 week!) But I gave it my best effort and I quite like how it has turned out.

I discovered that symmetry is really hard! The front doesn't line up perfectly (which annoys me as I am a perfectionist, and I have been tempted to unpick the whole thing to re-do it... but then I realise that there are more important things in life) The back lines up okay, so its not a complete disaster.

Its got appliqued sections which I embroidered using dissolvable fabric and stitch to 'fuse' the two colours together. And the little white blobs, I painted on with acrylic. Some heavy duty interfacing is helping to hold the shape.

Hope you like it...........


I am hoping that if we get some nice weather where I live I am going to do a proper photoshoot with the cape. I really want to photograph some one wearing it in a forest with sun-light streaming through the branches.... that is if we get any sun this year! :)

xox Niamh xox

3 February 2013

Knitting Sample

Hi all,

So here is the little knitting sample I made in the knitting workshop I did. I knitted with both net and a yarn I made up. I had never thought of making my own yarn, but it is really fun and gives you so much more control over the design and outcome.
I combined three existing yarns (a black wool, blue chenille yarn and a grey mohair yarn) I stitched them together using the zig zag stitch on the sewing machine, and every 10 cms or so I included a little strip of the same netting (or a white cotton)
I knitted it up on 5mm needles, which I think might be a little too small for the net. I am cursed with being quite a tight knitter, so I did struggle in a few places to get the needles through the net!

Here it is...


So...who loves knitting???

xox Niamh xox


30 January 2013

Annabelle's Butterfly Dance

Hi all,

I am very sorry for how long I have left without posting! I have been super busy with Uni applications, which are slowly becoming less busy. I am very excited as I have had an offer from UCA Epsom, after I did an interview there last week!

I have also been busy with college work, and I have made a butterfly cape thing... which I will be sharing with you shortly. But until then here is what I did yesterday in a watercolour workshop. I had to choose a film still (based on my project) so I chose a beautiful film still from Annabelle's Butterfly Dance (which is a restored Edison film) I highly recommend you look it up on youtube, its quite an early film and I believe that the stills were hand coloured.


So here are my loose interpretations of this beautiful image. I mostly focused on the colours...

Bleeding in the black ink, with some fine liner over the top.


Completely wet on wet process, and I softened the overall image by using brown ocher rather than the harsher black.


I really enjoyed the workshop, and I think I will definitely be experimenting more with watercolours, to try to improve my skills with them. As someone who loves precision, watercolours are really pushing my limits as they are quite unpredictable, but I loved watching the colour seep over the page like little veins.

xox Niamh xox

11 November 2012

Fashion and Architecture - Paper Dress

Hi all,

So this is the follow up post to the illustration one from my fashion project weeks at college. This is the paper 'dress' that I made inspired by modern architecture. I went a little crazy with the loopy design, and added some fan like pieces at the waist. I have absolutely no idea if I am going to be able to successfully convert this design into fabric, but I really enjoyed making this one :)


So I hope you liked seeing this :)

xox Niamh xox